A short walk
through Bashō.
Seven steps from a blank screen to a kept trip — plus answers to a few things people ask. Take it in order, or jump to what you need.
Prefer the quick tour?
Take the welcome tour instead.
Step 1
Create a trip
A trip is the container for everything else — plans, travelers, photos, audio, notes. Start there before forwarding any confirmations.
- Open Trips from the hamburger menu (top right).
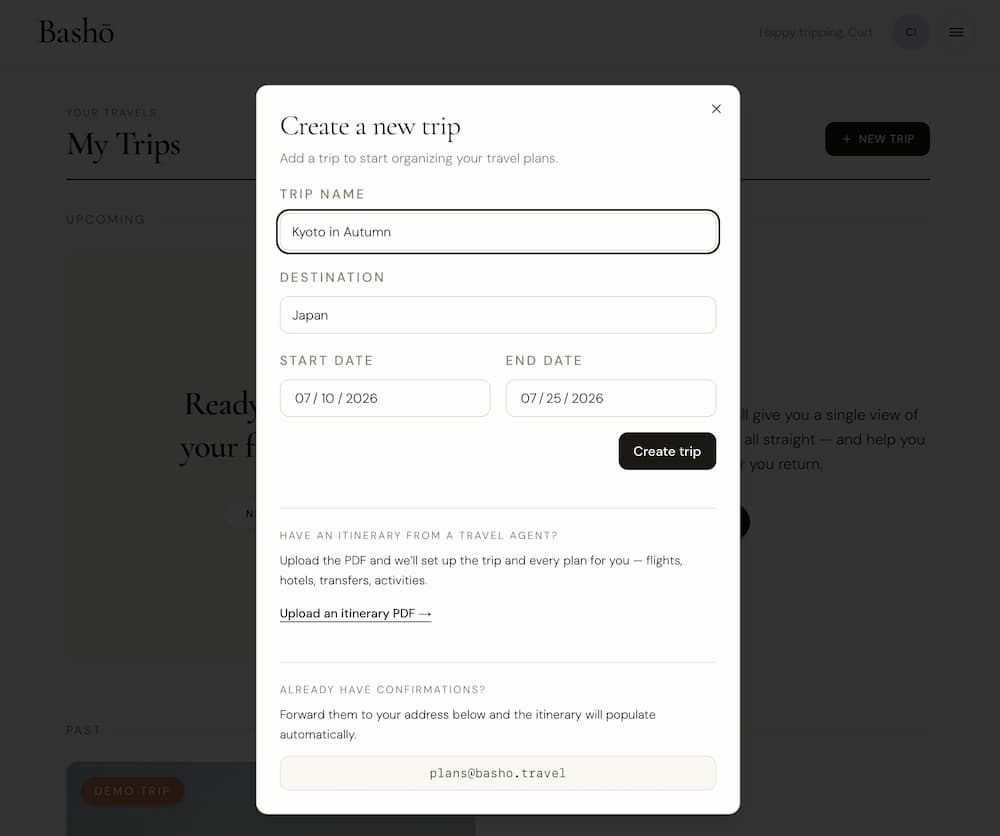
- Click New trip. Give it a name (“Kyoto in Autumn”), a destination, and start & end dates.
- The cover photo fills in automatically from Unsplash based on the destination. Open the trip’s Edit dialog any time to upload your own photo or pick a different stock image.
Dates are optional, but adding them unlocks the day-by-day itinerary and lets Bashō auto-tag photos to the right day from their EXIF.
Step 2
Forward a confirmation
The fastest way to add a flight, hotel, or reservation is to forward the email you already got from the airline, the OTA, or the restaurant. Bashō parses it and creates the plan for you.
- Forward any confirmation email to plans@basho.travel. Use the same address you signed up with — that’s how Bashō recognizes you. (You can add a second forwarding address under Settings if you use more than one email account.)
- The parsed plan lands in your Bashō Inbox (the Inbox tab inside Bashō, not your email inbox) — it does not file itself automatically. Open the Inbox tab from the menu when you’re ready.
- Click Move on an unfiled plan to assign it to an existing trip, or create a new trip on the spot from the same dialog.
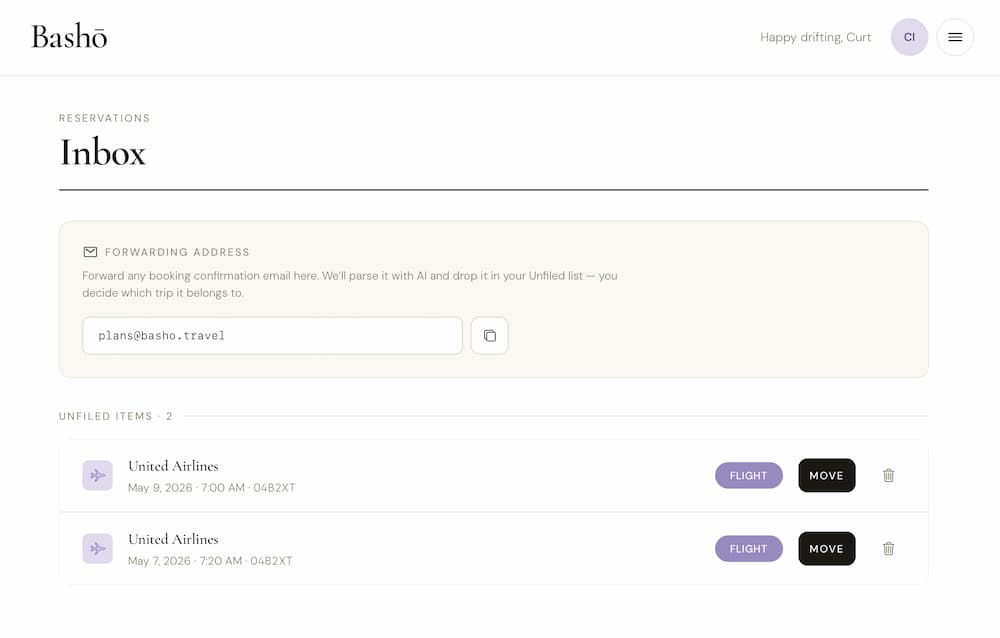
Bashō handles flights, hotels, restaurants, rail, cruise, concerts, car rentals, museums, spas, and more. If a plan can’t be parsed cleanly it’s saved as a note so you can fix it by hand — nothing gets dropped.
Step 3
Add a plan
Plans are the things you do on a trip — flights, hotels, restaurants, museums, hikes, concerts, notes. There are 29 types grouped into seven categories. Forwarding emails (Step 2) is usually fastest; reach for this when you’re adding something by hand, like a dinner reservation taken over the phone.
- Open a trip and click Add a plan. The picker groups types under Getting There, On the Ground, Eat & Drink, Health & Wellness, Experiences, Shopping, and Other.
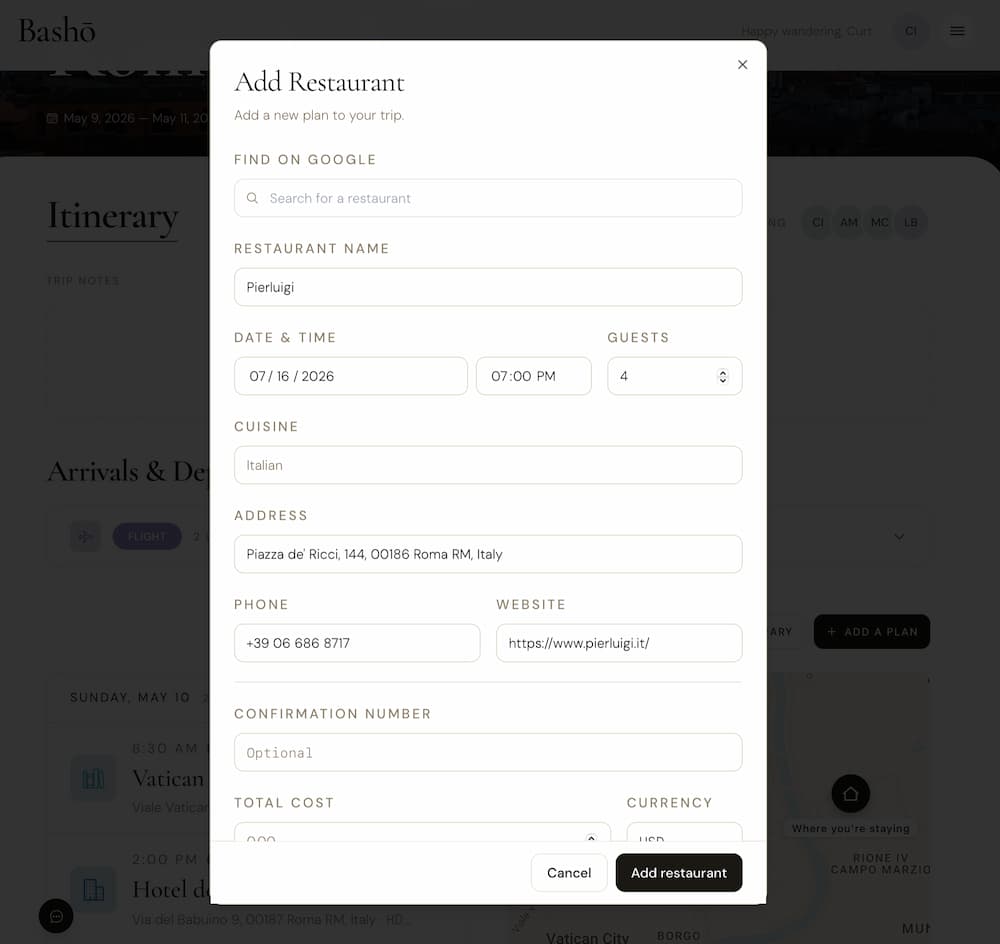
- Pick the type that fits — each one has a tailored form. Flights ask for an airline and flight number; restaurants ask for cuisine and guests; hotels ask for check-in & check-out.
- Fields with an address auto-geocode on save, so the plan shows up on the trip’s Map tab.
All plans share a single database row under the hood, so you can change a plan’s type after the fact and your details migrate cleanly.
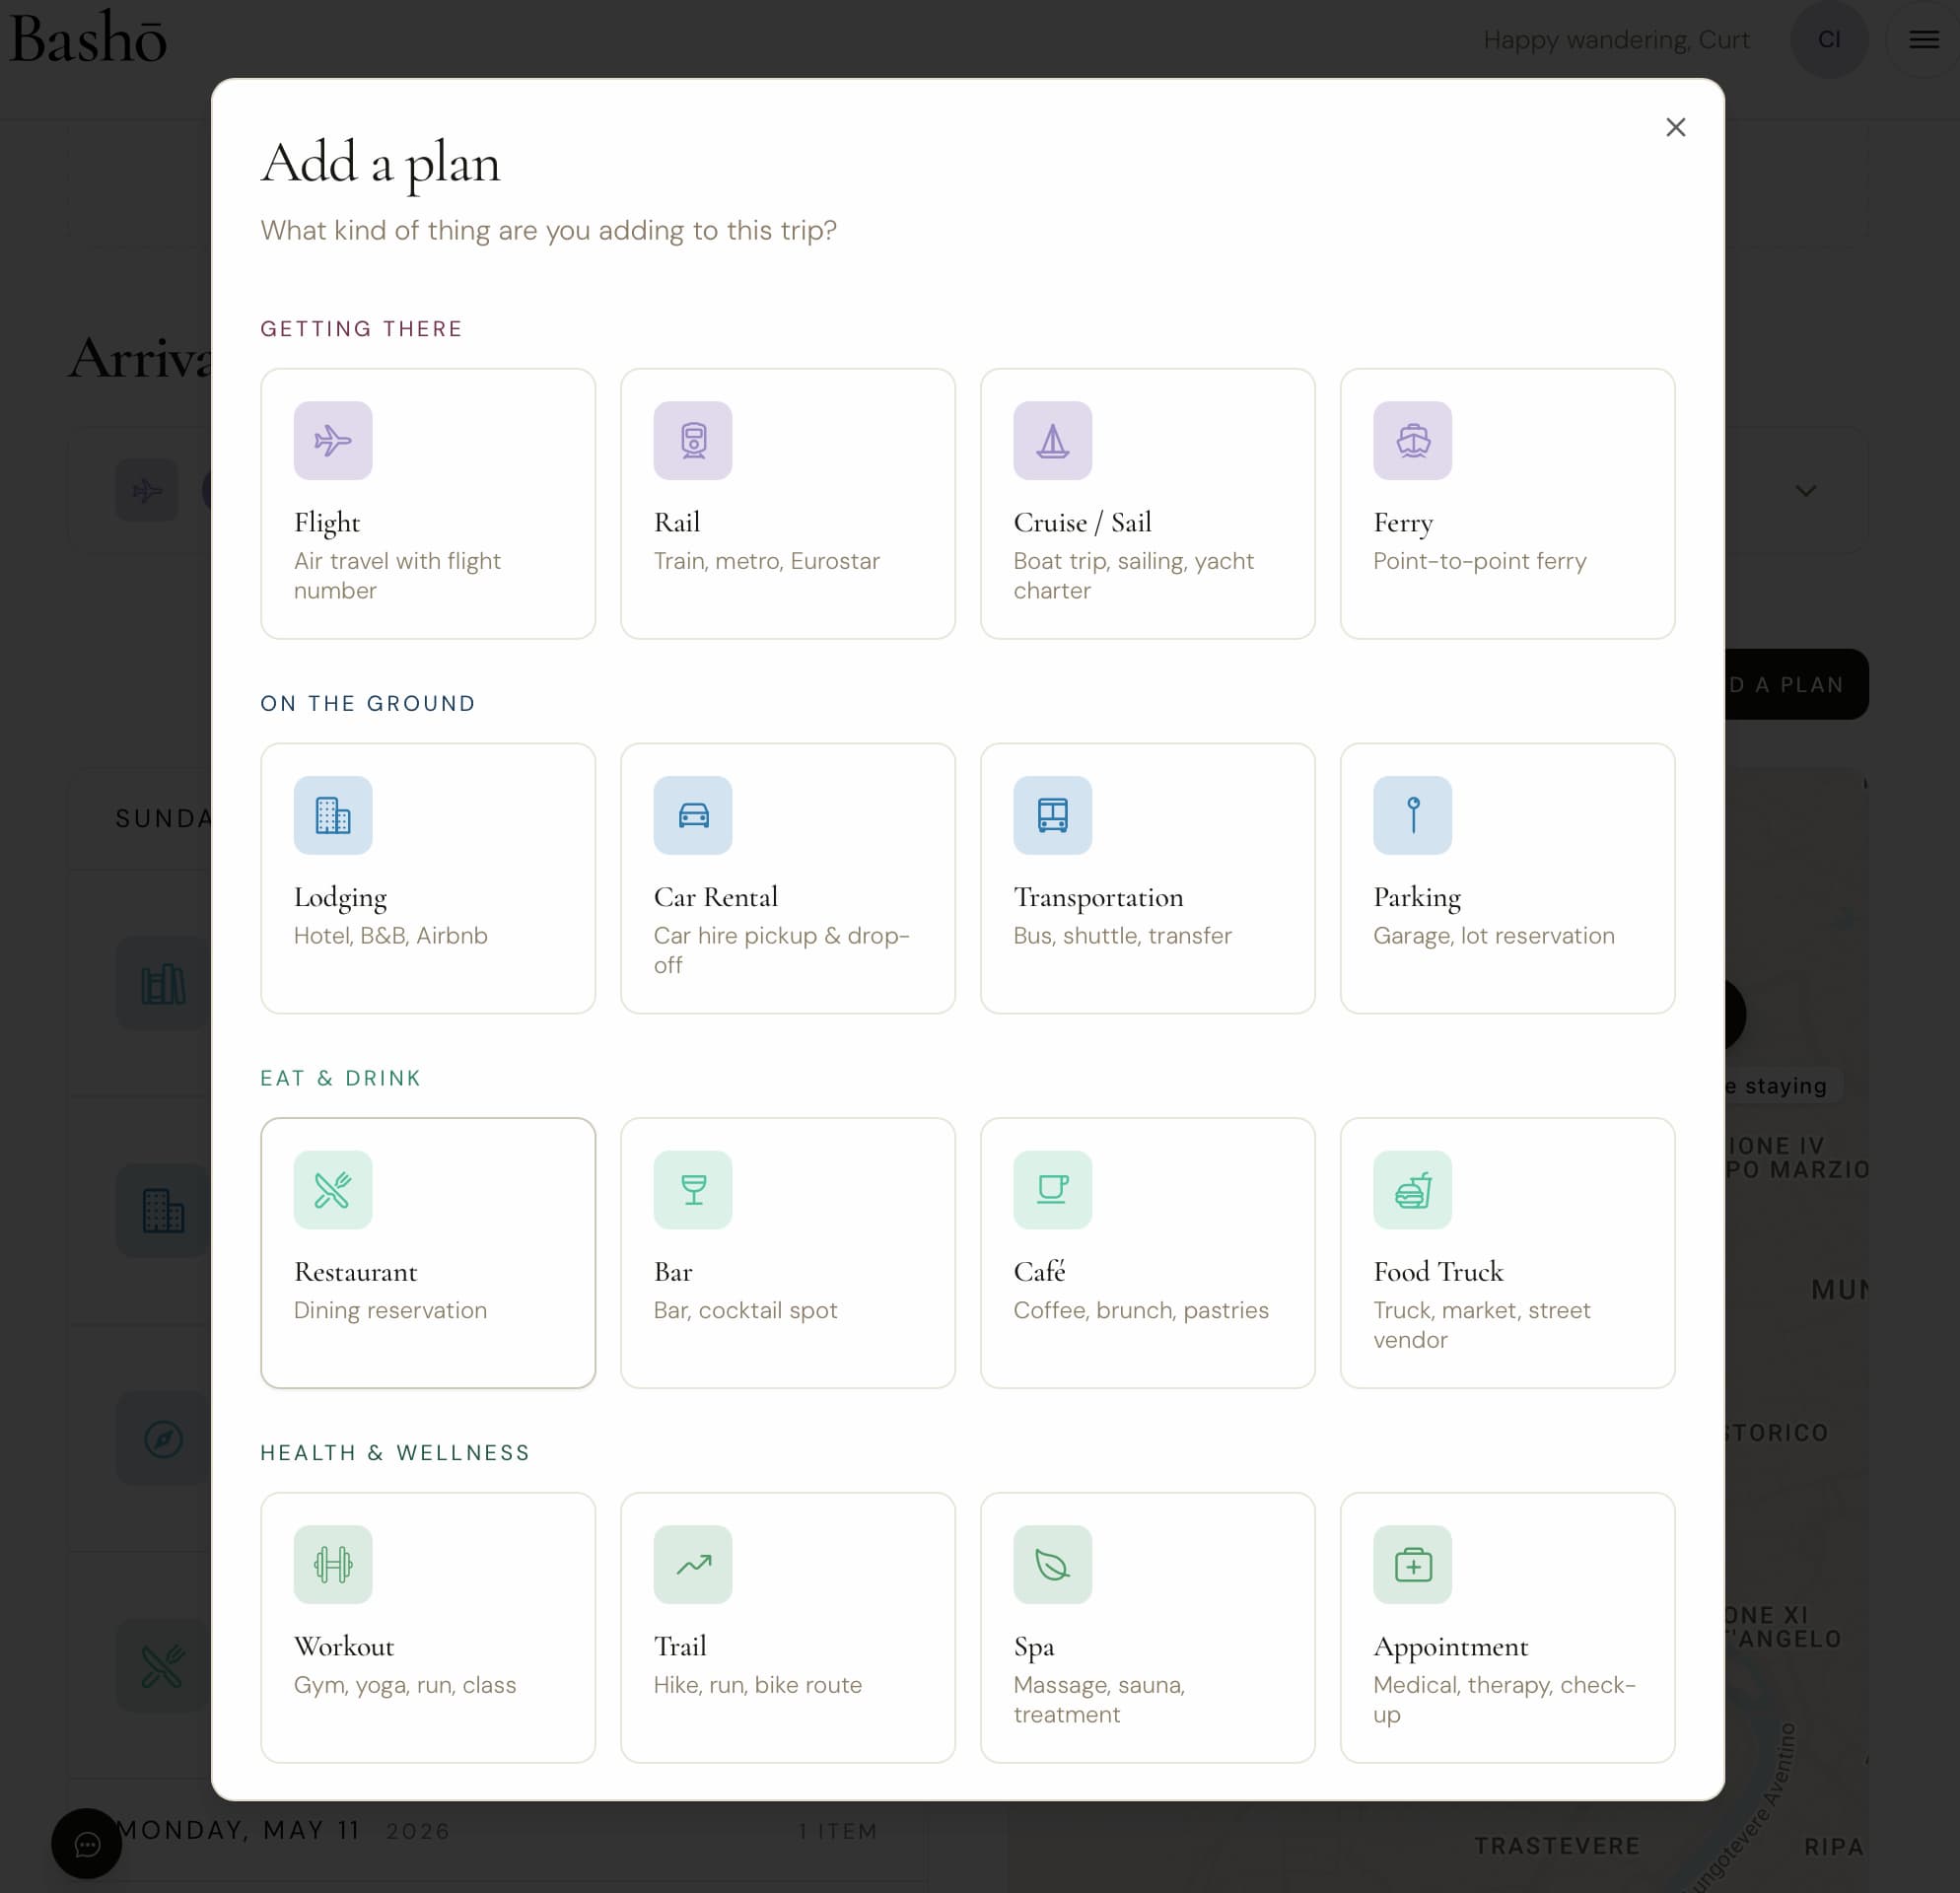
The plan picker — seven categories, 29 types.
Step 4
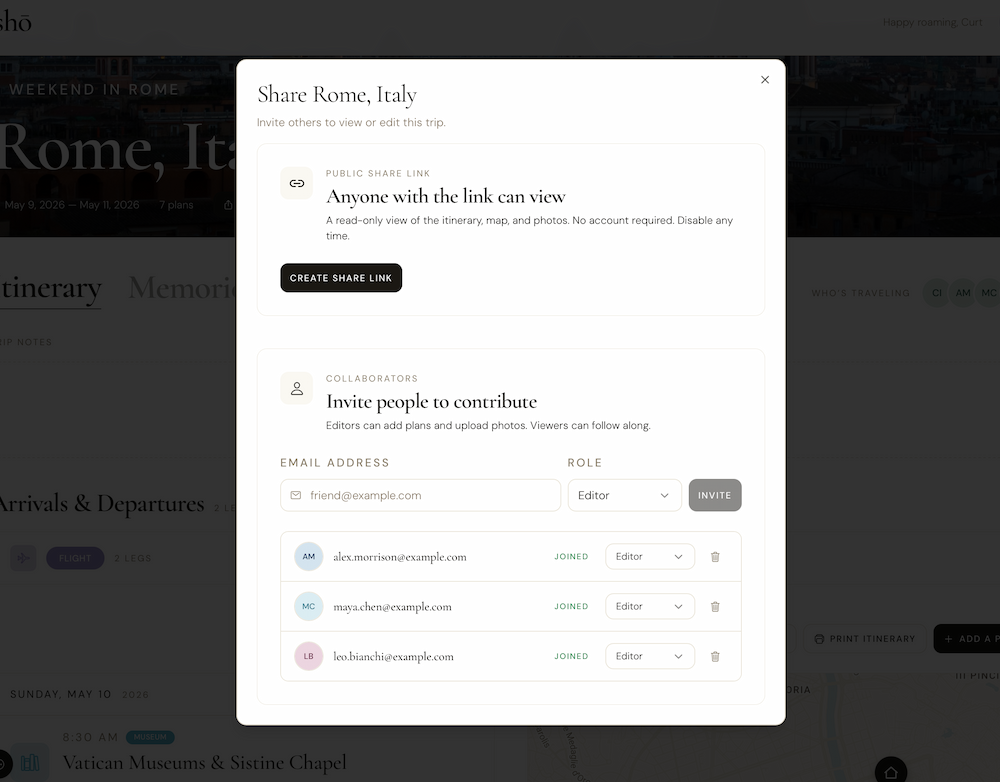
Share & invite travelers
Every trip has owner-only sharing controls — both a public read-only link for anyone, and email invites that turn people into collaborators who can add their own plans, upload photos, and edit the wishlist.
- Open a trip and click Share in the top right.
- Public link. Toggle the read-only share link on, then copy. Anyone with the link sees the itinerary, map, and photos — no account required. Toggle off any time.
- Invite by email. Type a traveler’s email, pick viewer or editor, and send. They’ll get an invitation from Bashō with a one-click link. New users get walked through signup; existing users land straight in the trip.
- Editors can add plans, upload memories, and edit wishlist items. Viewers can read but not edit.
Trips shared with you appear under Trips → Shared with me. You can leave a shared trip any time from its detail page.
Step 5
Save & share faves
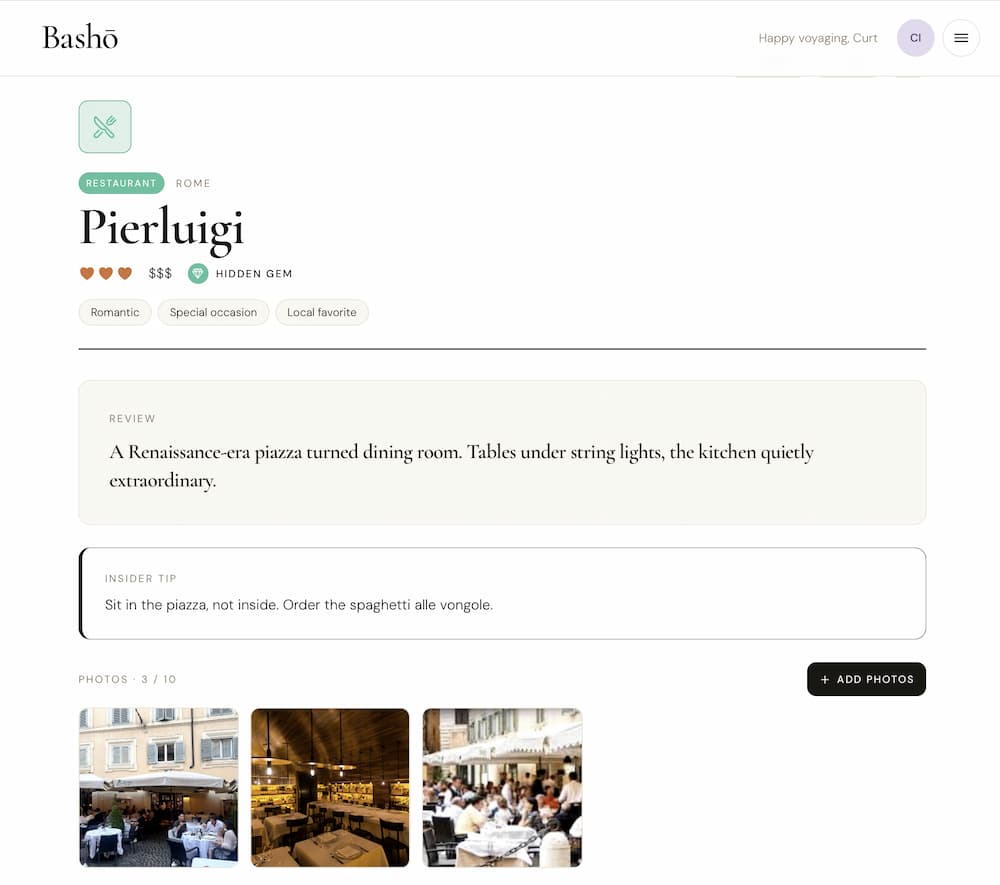
Faves are your personal travel address book — restaurants, bars, and hotels worth remembering. Each one keeps your review, hearts (1–3), vibe tags, price level, and an insider tip.
- Open Faves from the hamburger menu and click Add a fave.
- Search a place on Google to pull in the address, phone, and website automatically. Or import from an existing plan on a trip you’ve already taken. Or just fill it in manually.
- Add hearts, a price level, vibes (romantic / lively / great view / late night / hidden gem…), and what to order. Upload up to 10 photos.
- Share a single fave with one tap, or share a whole city as a guide. Use the city chips on the Faves page to filter, then click Share {city} for a recommendations link friends can browse on the map.
Step 6
Capture memories
Memories is Bashō’s name for the four kinds of things you bring back from a trip: photos, videos, voice or music recordings, and text cards (quotes, notes, factoids).
- On a trip, open the Memories tab and click Add a memory. Pick one of the four kinds.
- Photo / Video. Pick from camera roll or files. Bashō converts HEIC to JPEG, reads EXIF to auto-assign the day, and compresses large videos client-side so they fit.
- Audio. Record in the browser — narration, music, a moment of street noise. Pause, resume, review, then save with a caption.
- Text. Write a quote with attribution, or a quiet note. Pick a palette swatch or a background image. Toggle Quote for big magazine pull-quotes, Note for plain factoids.
Each memory can be re-assigned to a different day, captioned in the lightbox, or tied to a specific plan when you create it from a plan’s detail page.
Step 7
Open the book
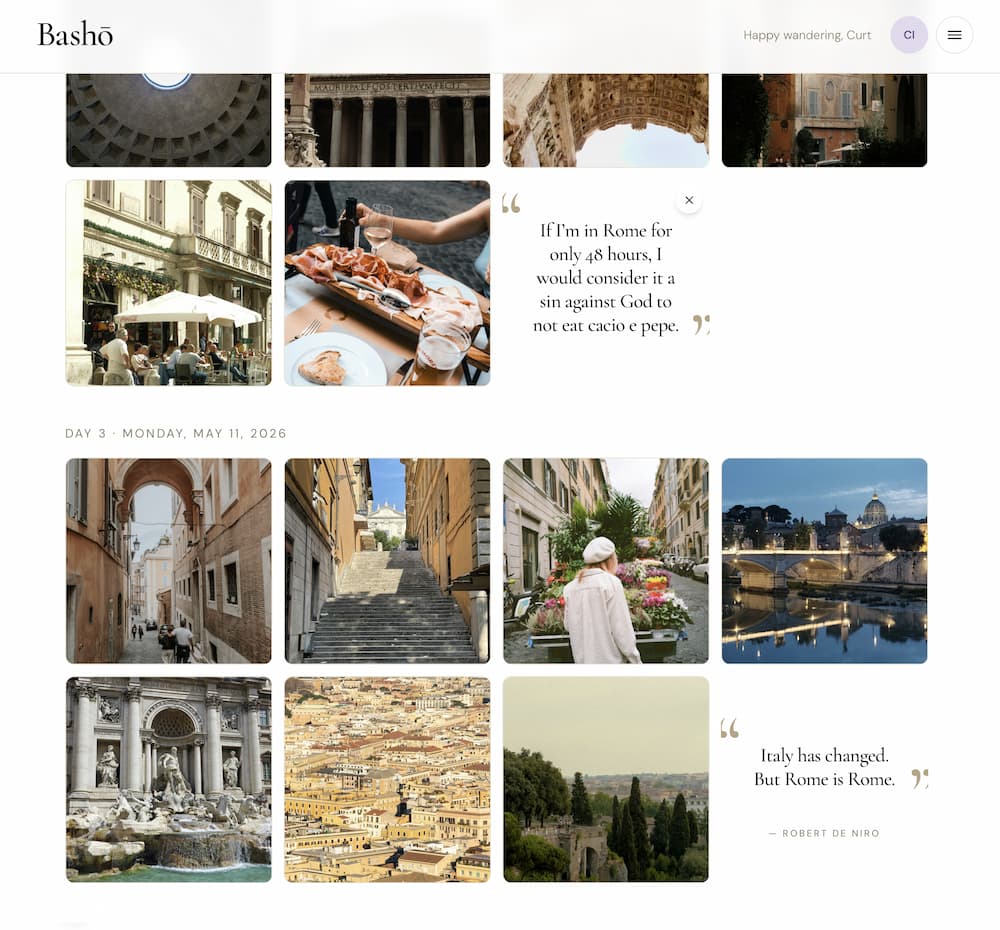
When a trip is past, open it and click View Book. Your Bashō book is a quiet, editorial keepsake view of the whole journey — a cover, a map of all the places, a day-by-day spread with the memories laid out like a magazine.
- Hover any tile in the book to resize it (S / M / L / Hero), reorder with the arrows, or remove it.
- Click a day’s description to edit it; clear it to fall back to the auto-generated summary.
- Share the book with the same per-trip share controls — anyone with the link sees the same editorial view.
FAQs
Frequently asked
Is Bashō free?
Do I have to forward every email?
What happens to a forwarded email Bashō can’t parse?
Can I use more than one email address?
Can my partner see and edit the trip?
Are my photos private?
What kinds of plans can I add?
What happens to a trip when it’s over?
How do I delete a trip or a plan?
Something looks broken. Where do I report it?
Photos from Unsplash